
When producing a document which is to be trimmed with a colour, text or graphic right up to the final edge it is important to add 'bleed' to the outer edges. We normally work to a 3mm bleed around each edge, as shown below..

As you can see the graphic is overrunning the page 3mm from the edge.
The reasons for this are to do with small movements of the paper, mainly from the final cutting on the guillotine after it has already been printed, and ensures that your final print is exactly how you want it and doesn't have a tiny white border round the edge.
Example - Your leaflet is to be A5, which has a finished size of 148mm x 210mm, the supplied artwork should be 154mm x 216mm. So, the final size plus 3mm all the way round.

Take the examples below:-
IMAGE 1 - The file before trimming, you'll notice the corner tick marks where the trimming will occur and the red line is where it will be cut all the way around. Ensuring there is no white paper left on the leaflet.

IMAGE 2 - We have pointed out specific areas which are obvious they have been trimmed into, as below.
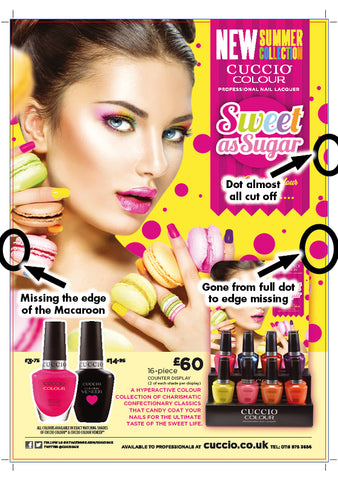
IMAGE 3 - The final printed leaflet, with the bleed trimmed off, you can see the areas marked above have been cut off below.
